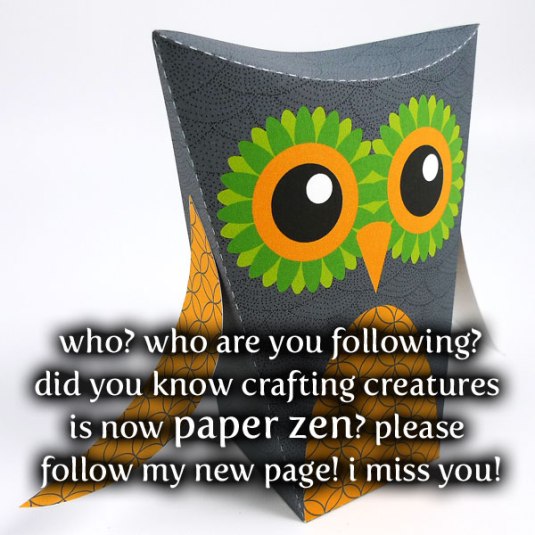
Please follow my new blog, Paper Zen for my latest projects and tutorials!
our fingers can’t stay still
29 Oct 2013 2 Comments
Please follow my new blog, Paper Zen for my latest projects and tutorials!
28 Aug 2013 Leave a comment
in by Cecelia, Digital Die Cutter, Paper Tags: box, bride, die cut, dress, groom, svg, tuxedo, wedding
22 Aug 2013 Leave a comment
in by Cecelia, Digital Die Cutter, Paper, quilling Tags: die cutting, invitation, party, printable, quilling
09 Aug 2013 Leave a comment
in by Cecelia, Digital Die Cutter, Paper, quilling Tags: envelope, pdf, printable, quilling, thank you card

Dear Crafting Creatures readers, I want to say thank you!
I started this blog years ago with my friends to inspire each other with our projects. I’ve been the only one adding to it for some time, and the name Crafting Creatures doesn’t suit my new direction. I will continue blogging in my spare time, but now it means more to me than a hobby. I’m taking my paper on new paths and I really hope you’ll follow me there, as I will not be updating this blog anymore.
My new blog is Paper Zen, which describes both how tranquil I feel when working with paper, and the enlightenment I hope my work gives others.
I’m indebted to you, kind reader, for giving me wonderfully encouraging words to keep going. To return your enthusiasm, I’d like to give you my quilled Thank You card and matching envelope. It’ll be for sale in my Etsy shop afterwards, so grab it now by visiting Paper Zen!

13 Jul 2013 Leave a comment
in by Cecelia, Digital Die Cutter Tags: box, chair, damask, die cut, gift, party favor, shower, Victorian, vintage, wedding

Although I’m more of a tomboy than a girly-girl, I did save every wedding party favor as a little girl, dreaming of the day I would marry my sweetheart. I don’t know why I have such a thing for boxes, but I do love how it’s hiding a small surprise. The ones I love most serve double purpose, whether to be decorative or in this case, to show a guest to their seat.

I used a heavyweight vellum which allows the damask pattern to be seen yet not obstruct the guest’s name. A square tag is glued to the front, with a couple’s special day and message.

The 1.75″ cube has a chair backing that is 4.25″ tall. Two boxes can be cut from a single sheet of 11 x 8.5″ paper. In this example I’ve used Silver Stardream cardstock. The font used here is Great Vibes.

Damask patterns have always been used in classic decor in such a broad range, and I struggled for quite some time to have the design be strong enough to hold the name tag. I also think it looks just as complete without the name tag, so it’s perfect for occasions other than weddings.
My Damask Chair Box is now available in my Etsy store for instant download. I’ve saved the files in SVG, DXF, MTC, and PDF formats. Thanks so much for your kind comments!

01 Jul 2013 2 Comments
in Books, by Cecelia


I shot a video of opening the Mystery Box, (All Things Paper book by Ann Martin) and the publisher, Tuttle, has now got it live on their site. Click the “Product Video” tab to see how it works!
http://www.tuttlepublishing.com/origami-crafts/all-things-paper-paperback-with-flaps
16 Jun 2013 Leave a comment
in by Cecelia, Digital Die Cutter, Greeting Card, Paper Tags: 3D, die cut, father's day
 My dad wears a ratty, tattered vest and even though I’ve given him new ones, he still keeps wearing the old one anyway. He doesn’t wear a bow tie, but I think he’ll get a kick out of this card anyway.

I’ve been experimenting in the realm of “printables” and this is made of 3 pieces – the bow tie, shirt, and vest, cut from 1 sheet of letter-size paper on 80lb cover stock. It was fun to shade the bow tie and give it a sense of 3D while really giving a 3D shape. Details in the buttons and stitching was a cinch to print. It helps keep the vest flaps down when the card is closed. I’ve written my message under the shirt, which is removable.

Somehow I quite like the back as well simply for its minimalism. He’s a man of little words, so I’ll see what kind of reaction I get during tonight’s dinner.

If you’d like to cut this card by hand, I’m selling a “printable” and “cuttable” file on Etsy.
13 Jun 2013 2 Comments
in by Cecelia, Digital Die Cutter, Paper Tags: bookmark, die cutter, free, monster

I’m showing Ann Martin’s book, All Things Paper, to family and friends, and as I flip to my project in I realized I could simplify my life with a bookmark.

There are many wonderful monster ones out there but I wanted ear flaps so they stuck out for easy finding. I added a dash of color in the eyes, so some quick marker strokes were all that was needed before gluing down the triangular flap.
Download a free compressed file containing SVG, DXF, and PDF files for personal use. Please leave me a comment if you have some time – I love hearing if you’re inspired to make something.

12 Jun 2013 2 Comments
in by Cecelia, Paper Tags: box
Open, says me! I can finally open up and share more about my Mysterious Stationery Box, which was included in Ann Martin’s wonderful book, All Things Paper. Being the eagle-eyed blogger she is, Ann was able to call upon creatives all around the world who work with paper, and showcase just how versatile paper can be.
My project is based on a common Japanese box (Karakuri Bako), which is traditionally made of wood and fabric to hold jewelry in evenly divided compartments. The mystery behind it is how the lid is double-hinged, allowing it to reveal the main compartment (above), and the smaller side compartments (below).
I make the lid stay closed snugly by gluing panels that just friction-fit within the compartment. I shot a video showing how it works that I hope Tuttle will show it soon on their site. This isn’t the first time making this box – actually I made it as my grad project while attending Emily Carr College so many years ago. I didn’t have money to buy the best materials back then, so when Ann asked me to create this project, I have to admit I was eager to re-do it with proper materials.

This project can be daunting for beginners, but I hope it inspires you to look at paper as a strong structural component to your creations.


24 May 2013 Leave a comment
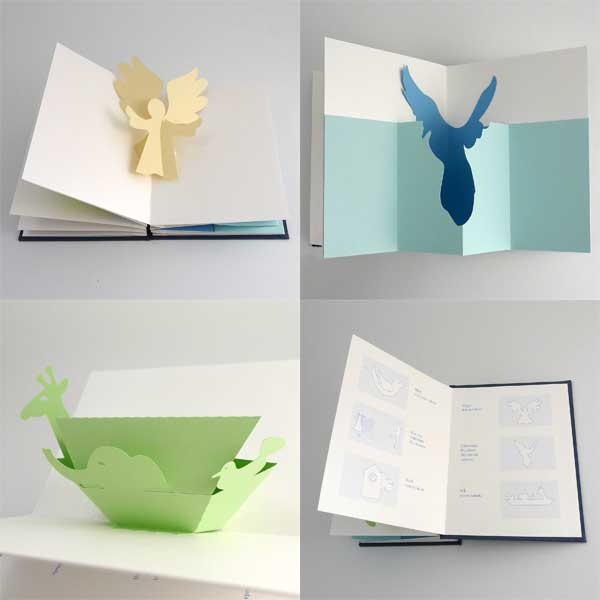
in by Cecelia, Digital Die Cutter, Paper Tags: pop up book
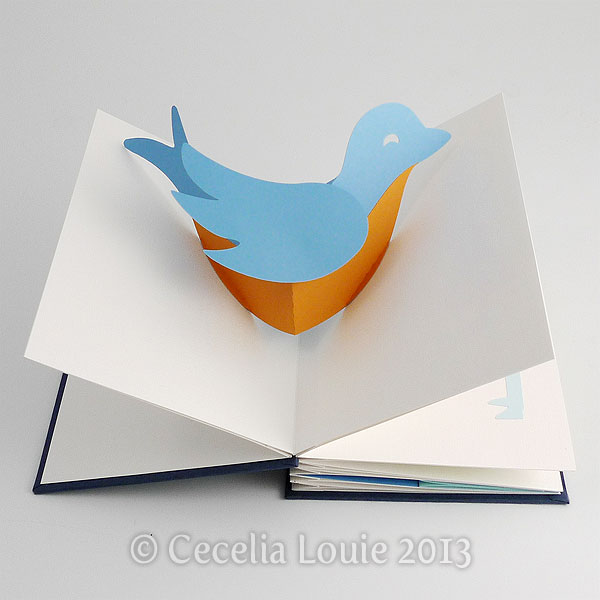
I’ve always wanted to make a pop-up book – not design one, because my mind doesn’t think this way – but I’ve always wanted to see how the mechanism worked just for the sheer magic of minimalism at its finest.
This swallow is a design by Jessica Tice-Gilbert who makes the most wonderful “how to” video that takes away any intimidation of making pop-ups. The wing rotates!
So when Paper Poet‘s Meet Up Group theme was Birds of a Feather, I interpreted it loosely and chose to make pop-ups I’ve admired over the years.

02 May 2013 2 Comments
in by Cecelia, quilling Tags: birthday card, quilling

Quilled birthday card for a guy this time.
01 May 2013 Leave a comment
in by Cecelia, quilling Tags: birthday card, quilling

Another quick and simple quilled birthday card.
29 Apr 2013 5 Comments
in by Cecelia, quilling Tags: birthday card, quilling

I have a few birthdays coming up. Felt like doing something spring and vibrant.
28 Apr 2013 Leave a comment
in by Cecelia, Paper Inspiration Tags: daiso, die punch, leaves

Someone recently asked how I made the leaves for my 3D Daisy Cake. I punched paper with this flower punch, then snipped out 5 petals. Then I used my quilling needle to score a line in the middle and gently folded it in half before gluing under the daisies.

The paper I used comes from Daiso. Shades of red, orange, and yellow are sold in a pack called “Warm”, while blue, green, and lilac are “Cool”. This is a 5×7 inch size and several sheets of each color is included. Larger sizes are also available for the same amazingly affordable price of $2, but you get less sheets of each color. The weight is not too light, not too heavy – just fantastic for my accenting paper crafts. The color is carried out through the entire sheet, not just printed on the surface, so you don’t get a incongruent core of white, especially if you plan to make your own flocking.

27 Apr 2013 Leave a comment
in by Cecelia, Digital Die Cutter, Paper, quilling Tags: 3D cake, birthday, card

This was a par-boiled idea, but I was making espresso the other day and realized the grounds are quite fine, so of course I thought of flocking. I have a birthday for a guy coming up and he loves coffee (it’s not as easy for me to make cards for guys for some reason). I thought of making a coffee cake and covering my cake with grounds, then topping it with real whole coffee beans.


18 Apr 2013 2 Comments
in by Cecelia, Digital Die Cutter, Tutorial Tags: 3D, birthday, cake, card, daisy, DIY, flocking, svg

I’ve been seeing flocking all over the stores (and some ingeniously decorated nails). It’s kind of like colored, fluffy, cotton candy, but in teeny pieces. I didn’t want to buy more things, so my first thought was can I make my own? Yes I can!
I borrowed the microfine shredder from the kitchen, wadded up some paper scraps from Daiso, and shredded away. In case I didn’t cover everything, I used the same color yellow as a backing, covered it in glue and dipped into my paper flocking (tweezers are helpful!). Then I glued it to my daisy flower, which then decorated my 3D cakes.

17 Apr 2013 Leave a comment
in by Cecelia, Digital Die Cutter, Paper Tags: 3D, birthday, cake, card, daisy, die cutting

Ever get those birthday cakes topped with plastic signage? I kind of wanted to replicate that for this birthday girl’s card. I stacked the words 4 times out of card stock to make my own chipboard, just like I did for the LOVE sculpture. This time I made the top layer out of a lighter green so when it’s viewed from the side, it gives another dimension – just a little something different. I stuck foam squares near the top so they stick up, then glued the bottom part behind the daisies.

Her fave color is yellow and since my original cake was too short to let me go nuts on the decorating, I made it twice as tall. I always place my elements on my card to assess the spacing before gluing permanently. Although I thought everything was well placed, it ended up being lower than I intended when I stood back. So I added the fireworks I used on my Mickey Mouse project to fill the top. I feel like I overdid that too, but ah well, I’ll live.
PS, here’s a teaser image for my next post, where I’ll explain how I made the stamens in the middle – yes, it’s paper!
11 Apr 2013 2 Comments
in by Cecelia, Digital Die Cutter, Paper, quilling, Tutorial Tags: 3D cake, birthday, card, die punch, flower

Before buying my Silhouette SD digital die cutter, I bought die punches like these. I toyed with giving them away, but now I’m really happy I didn’t.

I shudder to waste paper scraps and want to use every inch of it before tossing it out (see my post on How to Use up Scrap paper). Using these die punches was easier and faster than trying to register the exact placement needed on my Silhouette. However, I still used the Silhouette to cut my cherry blossoms (middle punch) because I wanted the cup the petals more readily.

Top left: If using a cherry blossom die punch, snip in between the petals to make them easier for cupping.
Top right: This blossom is cut from my die cutter – see the deeper gaps between petals? I used a burnisher and rubbed the petals against a mouse pad. For those who have a digital die cutter, here is the cherry blossom I made in SVG and DXF or PDF format.
Bottom left: Continue rubbing into the center to make a small bud.
Bottom right: If you want the blossom to stay open, flip it over and poke a smaller burnisher into the middle, then add dots with a felt marker to represent the stamens.
I then used them to decorate this 3D cake card.

11 Apr 2013 Leave a comment
in by Cecelia, Digital Die Cutter, Paper, quilling Tags: 3D cake, birthday, card, die punch, flowers
My sister in law is always well-dressed, so put together. She is feminine without being girly. I wanted to give her a 3D birthday cake card that expressed that (I hadn’t chosen my greeting yet when I took this photo).
I had so much fun making these flowers after being inspired by Michelle‘s version. After stepping back I worried I had gone too far and overdid it, but I think I’m just not used to so much adornment, being a tomboy at heart.

I cut some 1/8″ quilling strips in half which made them more pliable as I decorated the cake. This let me strew blossoms in a more random way. I used a white felt marker to dot some stamens in the middle of the blossoms.

I dipped the blossoms into Aleene’s Tacky Glue and they held fast when applied to the cake. I didn’t have to sit there and wait around. I’ll be showing how I shaped the blossoms in a following post soon.
07 Apr 2013 Leave a comment
in by Cecelia, Digital Die Cutter, FREE die cut pattern, Tutorial Tags: DIY, gift box, vinyl
 “Just buy a dollar store bag and save yourself time”, hubby said. But what’s the fun in that? OK, so I was kind of rushed, but it’s a different kind of rush right?

I salvaged a stationery box from work that fit my gifts perfectly, but of course it’s ugly. I amassed the largest pieces of scrap vinyl (salvaged from a sign store) that would go together.

I made sure the vinyl would cover the box with some excess on all sides, removed the wax, and placed the box right in the middle, using a bone folder to squish out the bubbles from the middle to the outside edges. Then I cut 45˚ slits toward the corners.

I brought the long flaps up, stuck it against the box and trimmed off the excess triangles, leaving a tab to fold over to the other side. This ensures you’ll never see the old box.

Then I adhered the short sides and trimmed off the excess all around.
My family and friends know I try to be as eco-minded as possible. I’ve had to ask for my xmas gift bags back and cushion their crestfallen faces by reassuring them another gift will come in the same bag next year. I don’t tend to do that with birthday gifts, so when my sis-in-law saw this box, the first thing she said was “Can I keeeep it?” and hugged it to her chest. I can’t tell you how happy that made me!
I’ve used this free flowers file for other projects in the past like cards and flower pots: http://www.fordesigner.com/maps//10878-0.htm
03 Apr 2013 2 Comments
in by Cecelia, Paper, Tutorial Tags: fold, lucky, origami, paper, pattern, ribbon, star, tutorial

For years I used to carry a small tin case with travel scissors and paper. I would fold stars on the bus, waiting rooms, dark movie theaters, and while having conversations with people because folding was like breathing. To give a jar filled with 365 stars to someone showed you thought of them every day of the year. I’ve lost count after a thousand stars but always enjoyed seeing their expression. I’ve decorated greeting cards, the outside of jars, even Christmas trees with them – is it a wonder I used them in my wedding invitations?

There are many tutorials online for folding Lucky Stars but while teaching others how to make it, I’ve learned their number one mistake is creasing the first folds too much. By the time you reach the end and are ready to “puff”, the star is apt to squish to one side rather than separate into it’s 3D glory. Notice how it’s gently folded in place but not sharply creased? If you haven’t had success in the past, please try again with this small change and let me know if it made a difference for you.

I also like to fold around a string as I go, to make a bracelet or a garland of stars. The easiest material to use is ribbons because the width is ready to go and they’re oh-so-shiny.
To see my step-by-step tutorial, please visit my guest post on Ann Martin’s blog, All Things Paper. If you haven’t seen Ann’s work before, prepare to lose a few hours exploring her site. Her wedding certificates are simply exquisite as they enhance the newlyweds’ choice of theme. Any time a beginner quiller asks me for basic steps, I always point them to Ann’s Basic Tutorials because she really pays attention to the nuances and helps people realize quilling is not as hard as it looks. Her paper projects (check out her washi Easter egg tutorial) entice you to try different techniques and materials.
Ann also interviews paper artists around the world, showcasing their work and highlighting the subtleties. As if her plate isn’t already full scouring the web and offering up the best eye candy, she has also authored a book of the same title, All Things Paper, which is like a hard copy of her popular site – but contains nothing you’ve seen yet. Not only does Ann have uber-human attention to detail, she also has a way with words, describing steps as if painting a picture – the best kind of tutorial maker out there. Thank you for being you, Ann.
27 Mar 2013 2 Comments
in by Cecelia, die cutting, Digital Die Cutter Tags: 3D, anniversary, birthday, cake, card, wedding


I simply love seeing my designs come to life in another person’s hands. It’s wonderful to see the same cut file used in different colors and texture than I imagined.
The first card is made by Michelle of Michelle My Belle Creations. It seems so obvious now that the flowers she used was such an ideal choice. I also like the bling she added using sequins in the upper parts of the swoosh.
The second card is by Krafting Kelly of Finding Time to Create. Ah, these are the times I wish I had a ready supply of scrapbook paper in my shelf. I love how she placed the initial right on top of the cake – like one of those special candles. Again – why didn’t I think of that?
Thank you for playing with my files, Michelle and Kelly!
19 Mar 2013 Leave a comment
in by Cecelia, Digital Die Cutter, Paper Tags: 3D, anniversary, birthday, cake, card, wedding

I’m quite excited to offer these 3D paper cakes, easily customizable for a birthday, wedding, or anniversary in my Etsy store.

Here’s an example of a single layer chocolate cake with white circles icing (I used white vinyl). I’ve seen many examples of polka dotted icing on cakes, and thought it would great to have a matching background.

Add a second layer of cake on top and some swooshes to make a classic celebratory statement. I designed a subtle backdrop pattern made of diamonds and left a blank plaque above for whatever occasion you need.


My favorite has to be the 3-tier cake. Somehow the more tiers it has, the more fun it is. I decorated it with ribbon and matched the background using a scalloped edge. The chocolate shavings on top were made of quilling paper, but you can just as easily use any brown paper with 1/8″ width.

What cake would be complete without a cake box? I used some scrap plastic left over from some packaging and glued it with Scotch Quick Dry glue. I also added some easy-open tabs so you won’t have to struggle prying open a well-fitted box. All the cards are 5×7 inches.
Michelle of MichelleMyBelle Creations made an awesome purple cake with flowers, sequins, and textured backgrounds. I like how she added a bow to the stand which makes it more dimensional.
Please let me know what you think in the comments section!
13 Mar 2013 6 Comments
in by Cecelia, Digital Die Cutter, Paper, quilling Tags: 3D, birthday, cake, card, paper
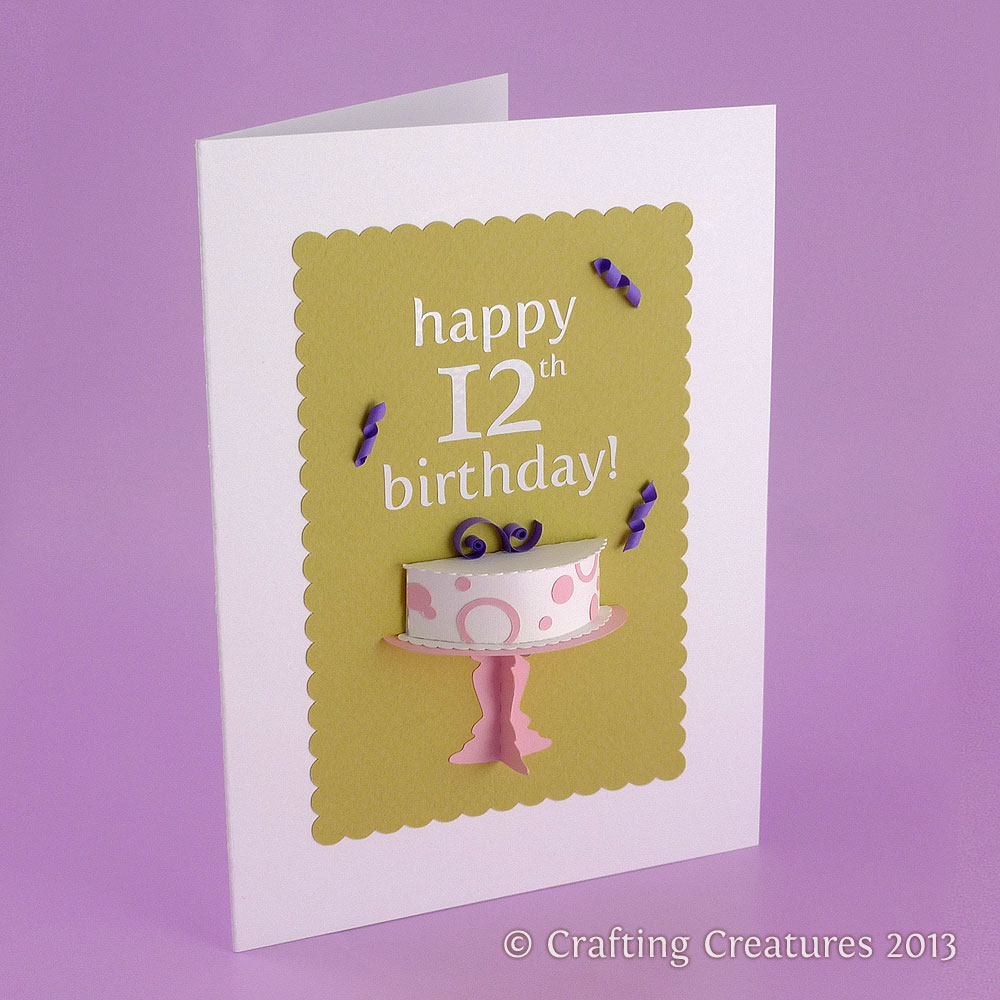
Wishing our niece a happy birthday with a bubbly cake. She was into pink for years and now that she’s on the brink of becoming a teenager, I thought I’d give one last shout-out to pinkness. Somehow the years of coloring with her made me really aware how well pink and purple go so well together.
The purple confetti and curls on top were made of quilling paper. The text is cut from vinyl. Everything else was cut with my Silhouette die cutter. I designed the 3D cake pattern months ago but got sidelined with a huge project, so I’m relieved to finally re-visit this in time to use it myself.
10 Mar 2013 Leave a comment
in by Cecelia, Digital Die Cutter, quilling Tags: 3D, artitst trading card, ATC, die cutting, owl, quilling

Paper Poet, New Westminster is holding a Meet Up to swap Artist Trading Cards this Friday. This is the first ATC I’ve ever made. Of course I’d use a combo of die cutting and quilling, and somehow express who I am. What I like the most is how the owl puffs up simply with a folded half moon on the top of his head. Please leave a comment – I really enjoy your feedback.


Recent Comments